Last updated: 2026-02-12
Getting Started
Welcome to Jam SQL Studio! This guide will walk you through installing the app, connecting to your first database, and running your first query. You'll be up and running in just a few minutes.
Step 1: Install Jam SQL Studio
Download Jam SQL Studio for your operating system and follow the installation instructions.
Download the installer
Visit the download page and select your platform. The download will start automatically.
Install the application
- macOS: Open the .dmg file and drag Jam SQL Studio to your Applications folder
- Windows: Run the .exe installer and follow the setup wizard
- Linux: Use the AppImage (chmod +x, then run) or install the .deb package
Launch Jam SQL Studio
Open the application from your Applications folder (macOS), Start menu (Windows), or application launcher (Linux).
Auto-updates
Jam SQL Studio checks for updates automatically in the desktop app. You can also run a manual check in Settings → Updates.
Privacy & analytics
Jam SQL Studio can send anonymous usage analytics to help improve the app. If a crash occurs, you can optionally send a sanitized crash report from the crash dialog. You can turn analytics off in Settings → Privacy. Reports never include SQL queries, database content, or connection strings.

Step 2: Create Your First Connection
Connect to a SQL Server, PostgreSQL, MySQL, Oracle, or SQLite database to start exploring your data.
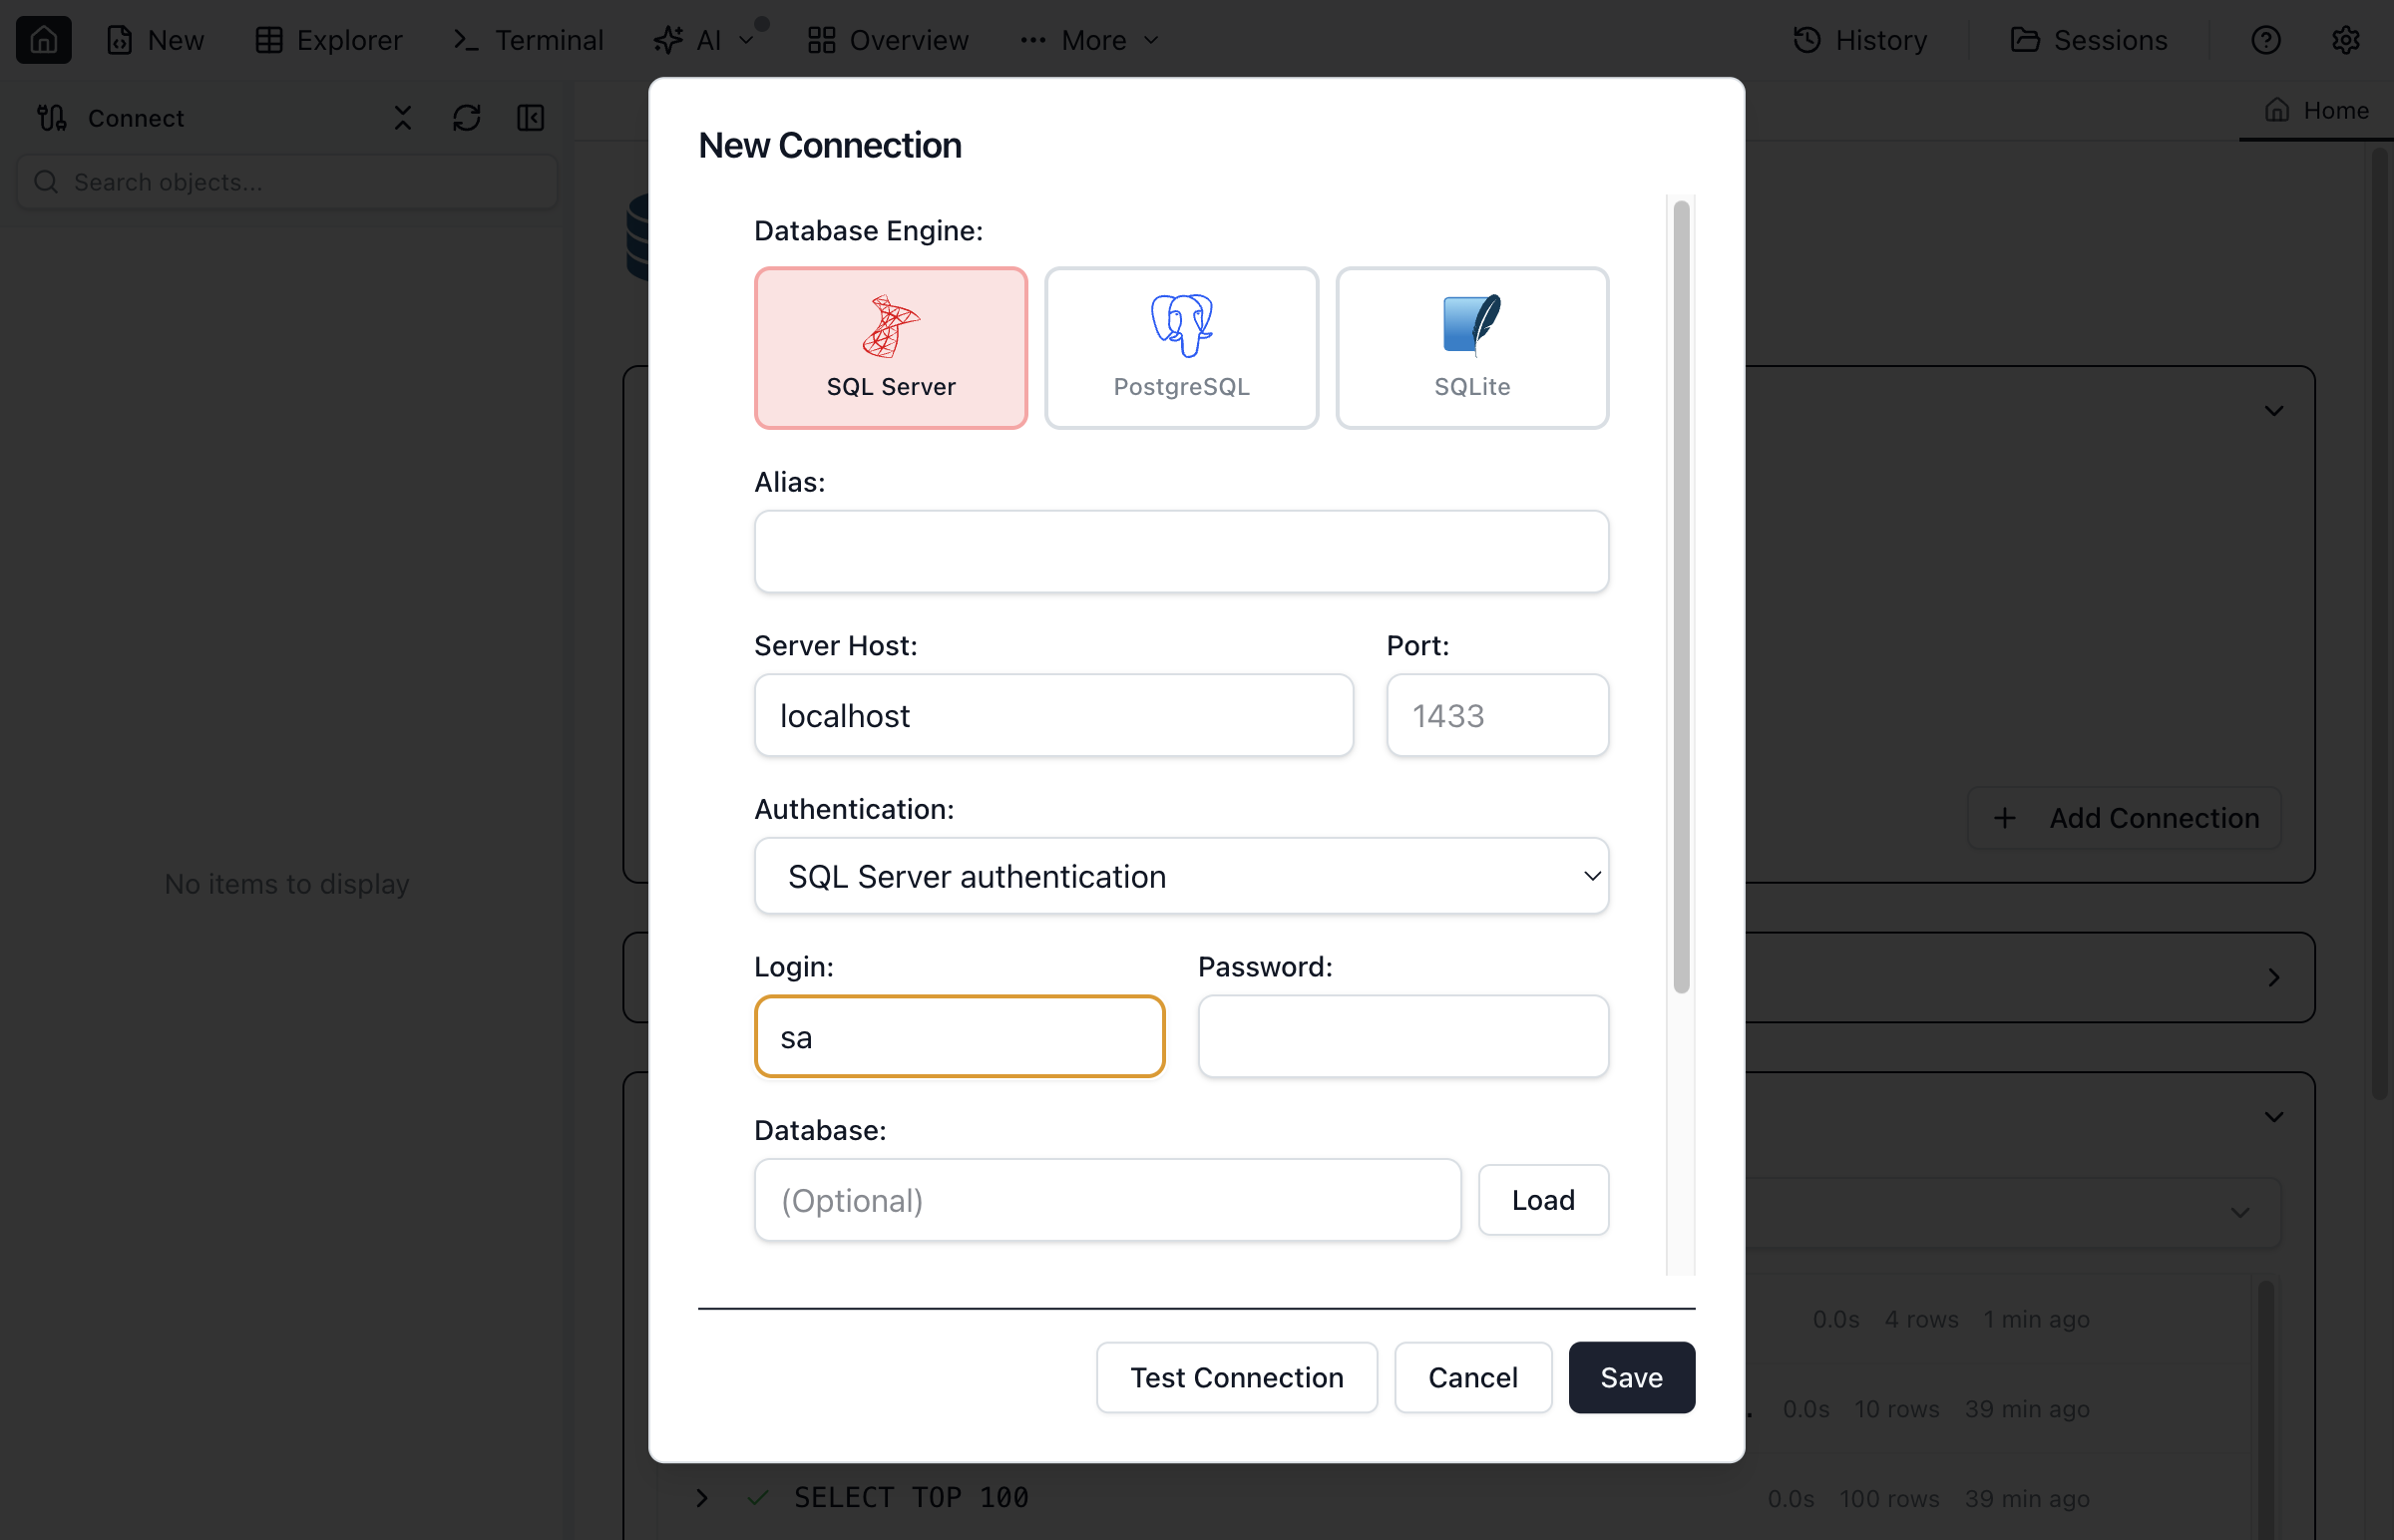
Click "New Connection"
In the sidebar, click the + New Connection button or use the keyboard shortcut Cmd+N (macOS) / Ctrl+N (Windows/Linux).
Enter server details
- Server name: Your SQL Server hostname (e.g., localhost, server.example.com, or 192.168.1.100)
- Authentication: Choose SQL Server Authentication or Windows Authentication
- Username/Password: Enter your credentials (for SQL Server Auth)
- Database: Optionally specify a default database
Test and save
Click Test Connection to verify your settings, then Save to store the connection for future use.
Connection Tips
For local development, use localhost or . as the server name. For SQL Server Express, try localhost\SQLEXPRESS. Make sure TCP/IP is enabled in SQL Server Configuration Manager.
Step 3: Run Your First Query
Now that you're connected, let's run a simple query to explore your data.
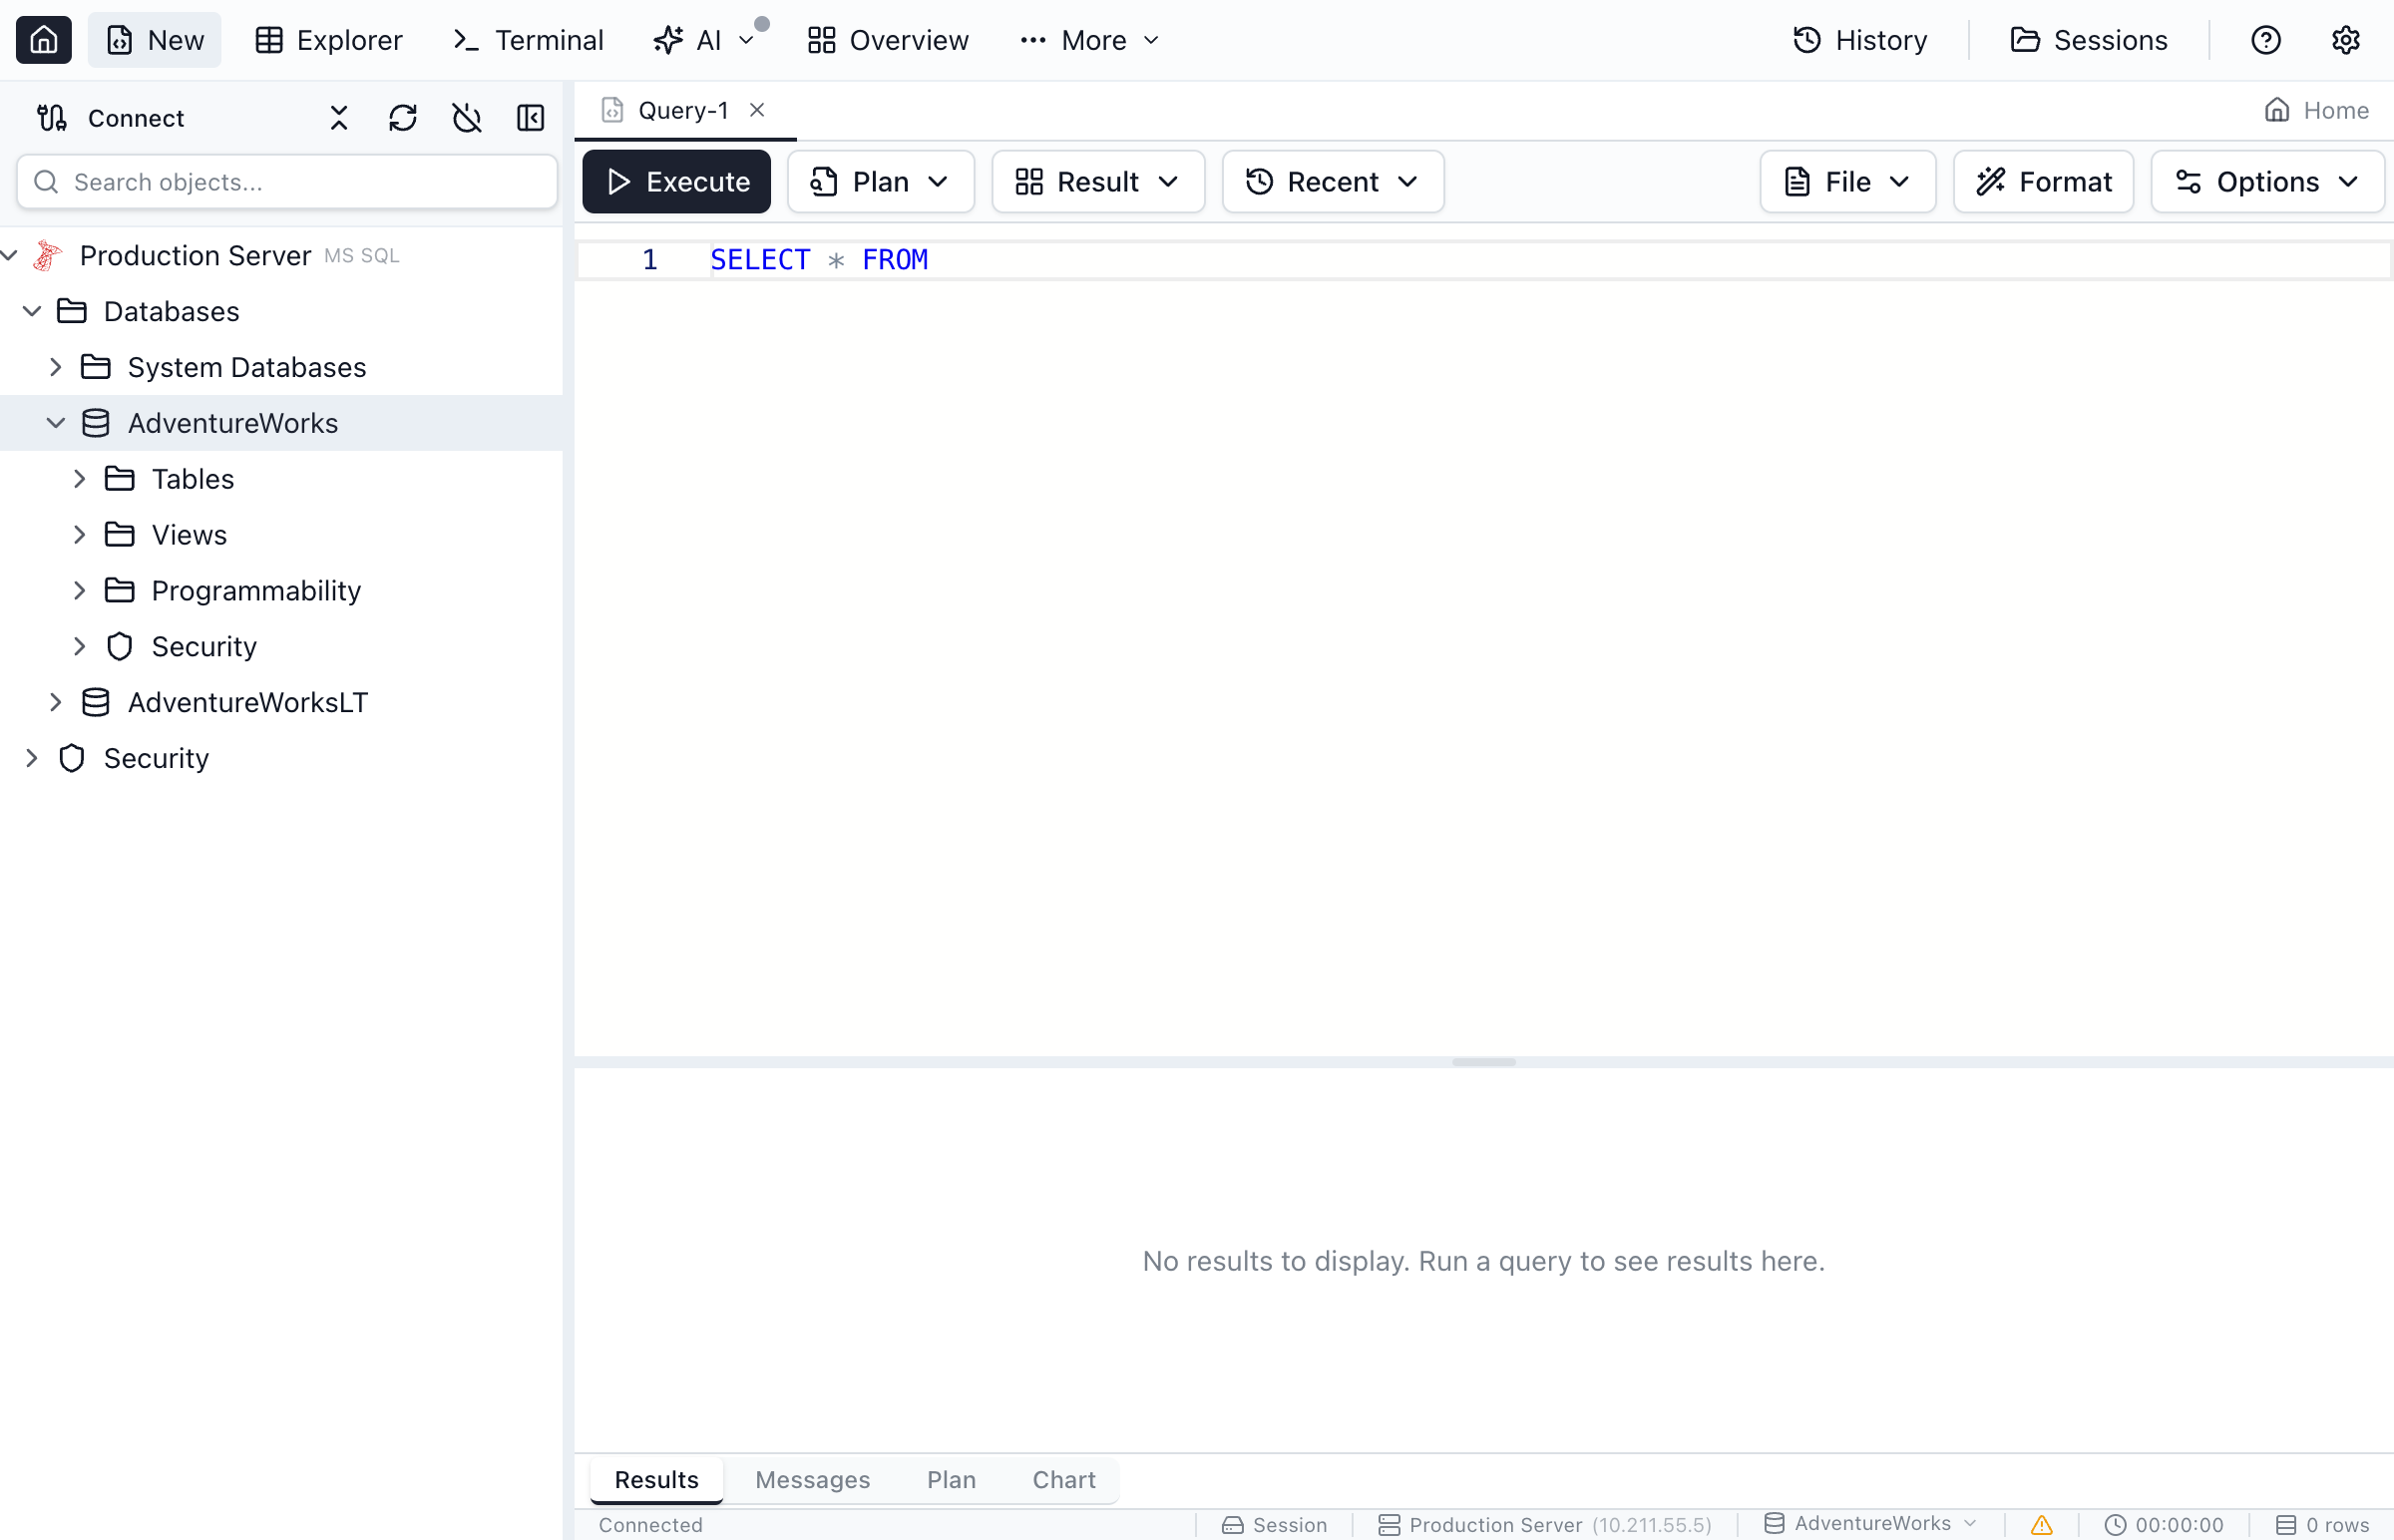
Open a new query tab
Click New Query in the toolbar or press Cmd+T (macOS) / Ctrl+T (Windows/Linux).
Write your SQL
Type a query in the editor. For example:
SELECT TOP 10 * FROM sys.tables ORDER BY name;Execute the query
Press Cmd+E (macOS) / Ctrl+E (Windows/Linux) or click the Execute button. Results appear in the grid below.
What's Next?
Now that you've connected and run your first query, explore more features:
Recommended Next Steps
- Explore the database - Use the sidebar to browse tables, views, and procedures
- Try Schema Compare - Compare schemas between two databases
- Analyze queries - View execution plans to optimize performance
- Organize scripts - Use the Scripts panel to pin and reopen .sql files
- Set up AI - Enable AI Workspace or MCP for AI-assisted development
Ready for More?
Explore the full documentation to learn about advanced features.