Last updated: 2026-02-12
Getting Started
Welcome to Jam SQL Studio! This guide will walk you through installing the app, connecting to your first database, and running your first query. You'll be up and running in just a few minutes.
Step 1: Install Jam SQL Studio
Download Jam SQL Studio for your operating system and follow the installation instructions.
Download the installer
Visit the download page and select your platform. The download will start automatically.
Install the application
- macOS: Open the .dmg file and drag Jam SQL Studio to your Applications folder
- Windows: Run the .exe installer and follow the setup wizard
- Linux: Use the AppImage (chmod +x, then run) or install the .deb package
Launch Jam SQL Studio
Open the application from your Applications folder (macOS), Start menu (Windows), or application launcher (Linux).
Auto-updates
Jam SQL Studio checks for updates automatically in the desktop app. You can also run a manual check in Settings → Updates.
Privacy & analytics
Jam SQL Studio can send anonymous usage analytics to help improve the app. If a crash occurs, you can optionally send a sanitized crash report from the crash dialog. You can turn analytics off in Settings → Privacy. Reports never include SQL queries, database content, or connection strings.

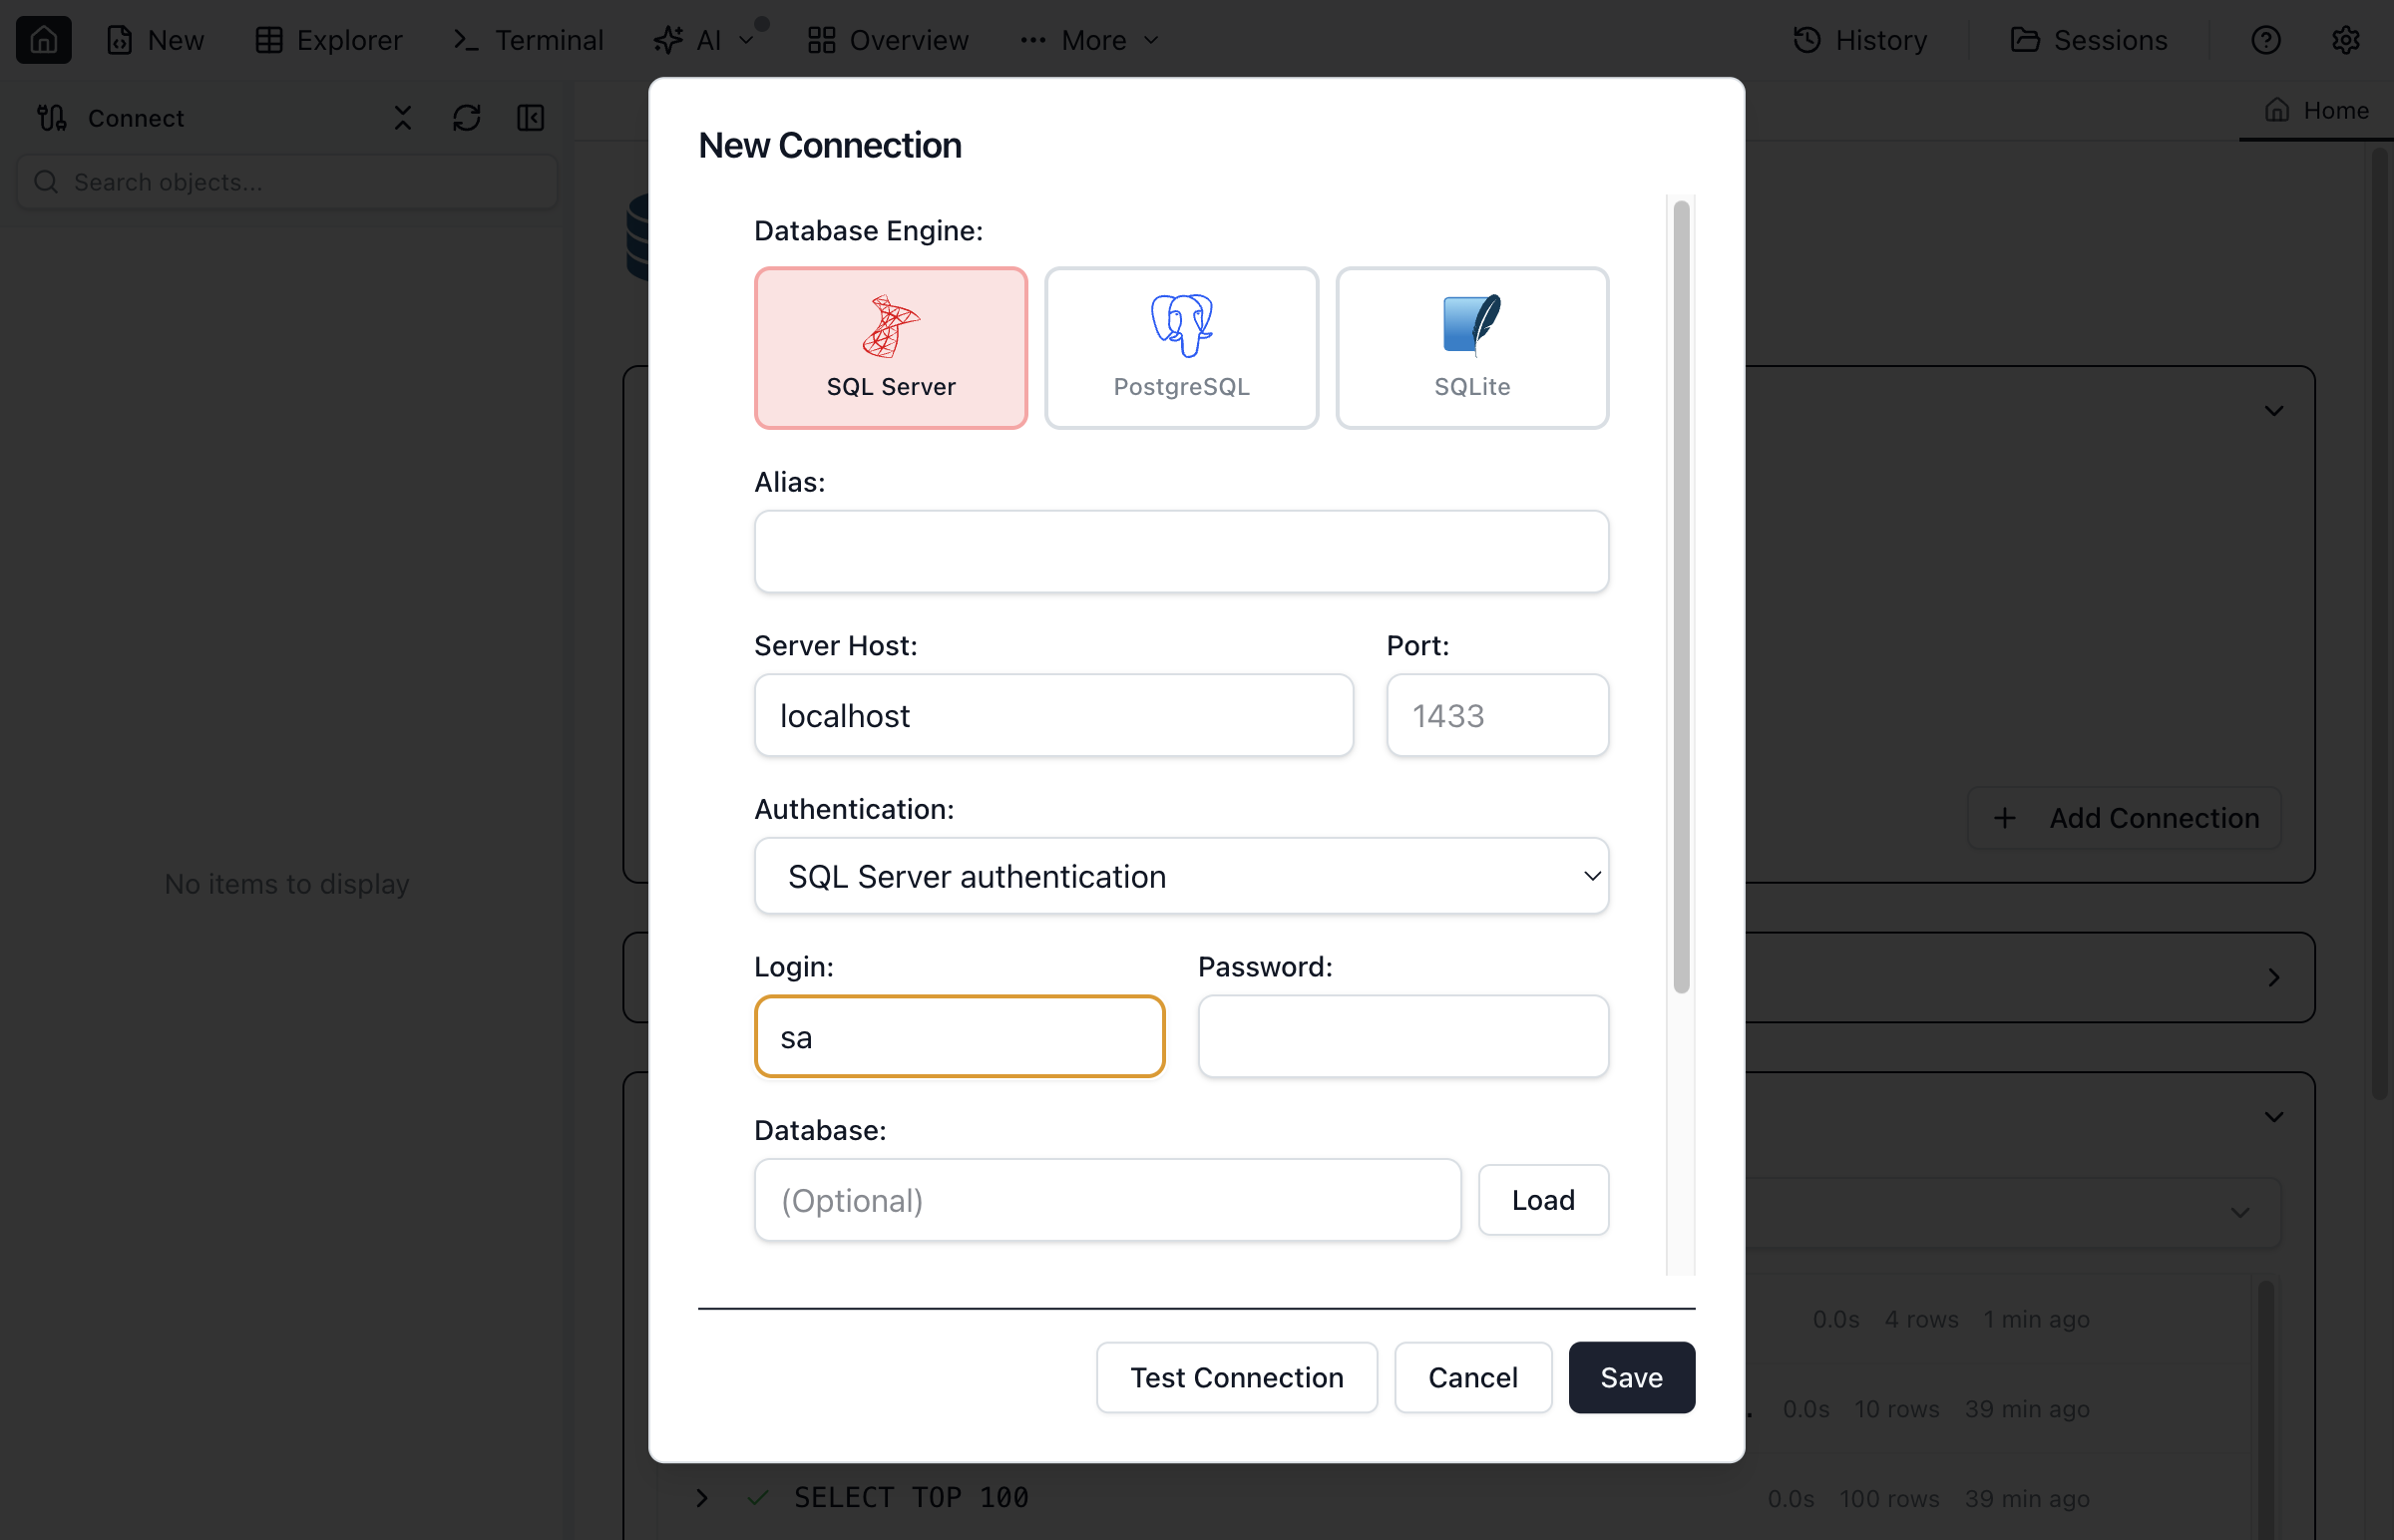
Step 2: Create Your First Connection
Connect to a SQL Server, PostgreSQL, MySQL, Oracle, or SQLite database to start exploring your data.
Click "New Connection"
In the sidebar, click the + New Connection button or use the keyboard shortcut Cmd+N (macOS) / Ctrl+N (Windows/Linux).
Enter server details
- Server name: Your SQL Server hostname (e.g., localhost, server.example.com, or 192.168.1.100)
- Authentication: Choose SQL Server Authentication or Windows Authentication
- Username/Password: Enter your credentials (for SQL Server Auth)
- Database: Optionally specify a default database
Test and save
Click Test Connection to verify your settings, then Save to store the connection for future use.
Connection Tips
For local development, use localhost or . as the server name. For SQL Server Express, try localhost\SQLEXPRESS. Make sure TCP/IP is enabled in SQL Server Configuration Manager.
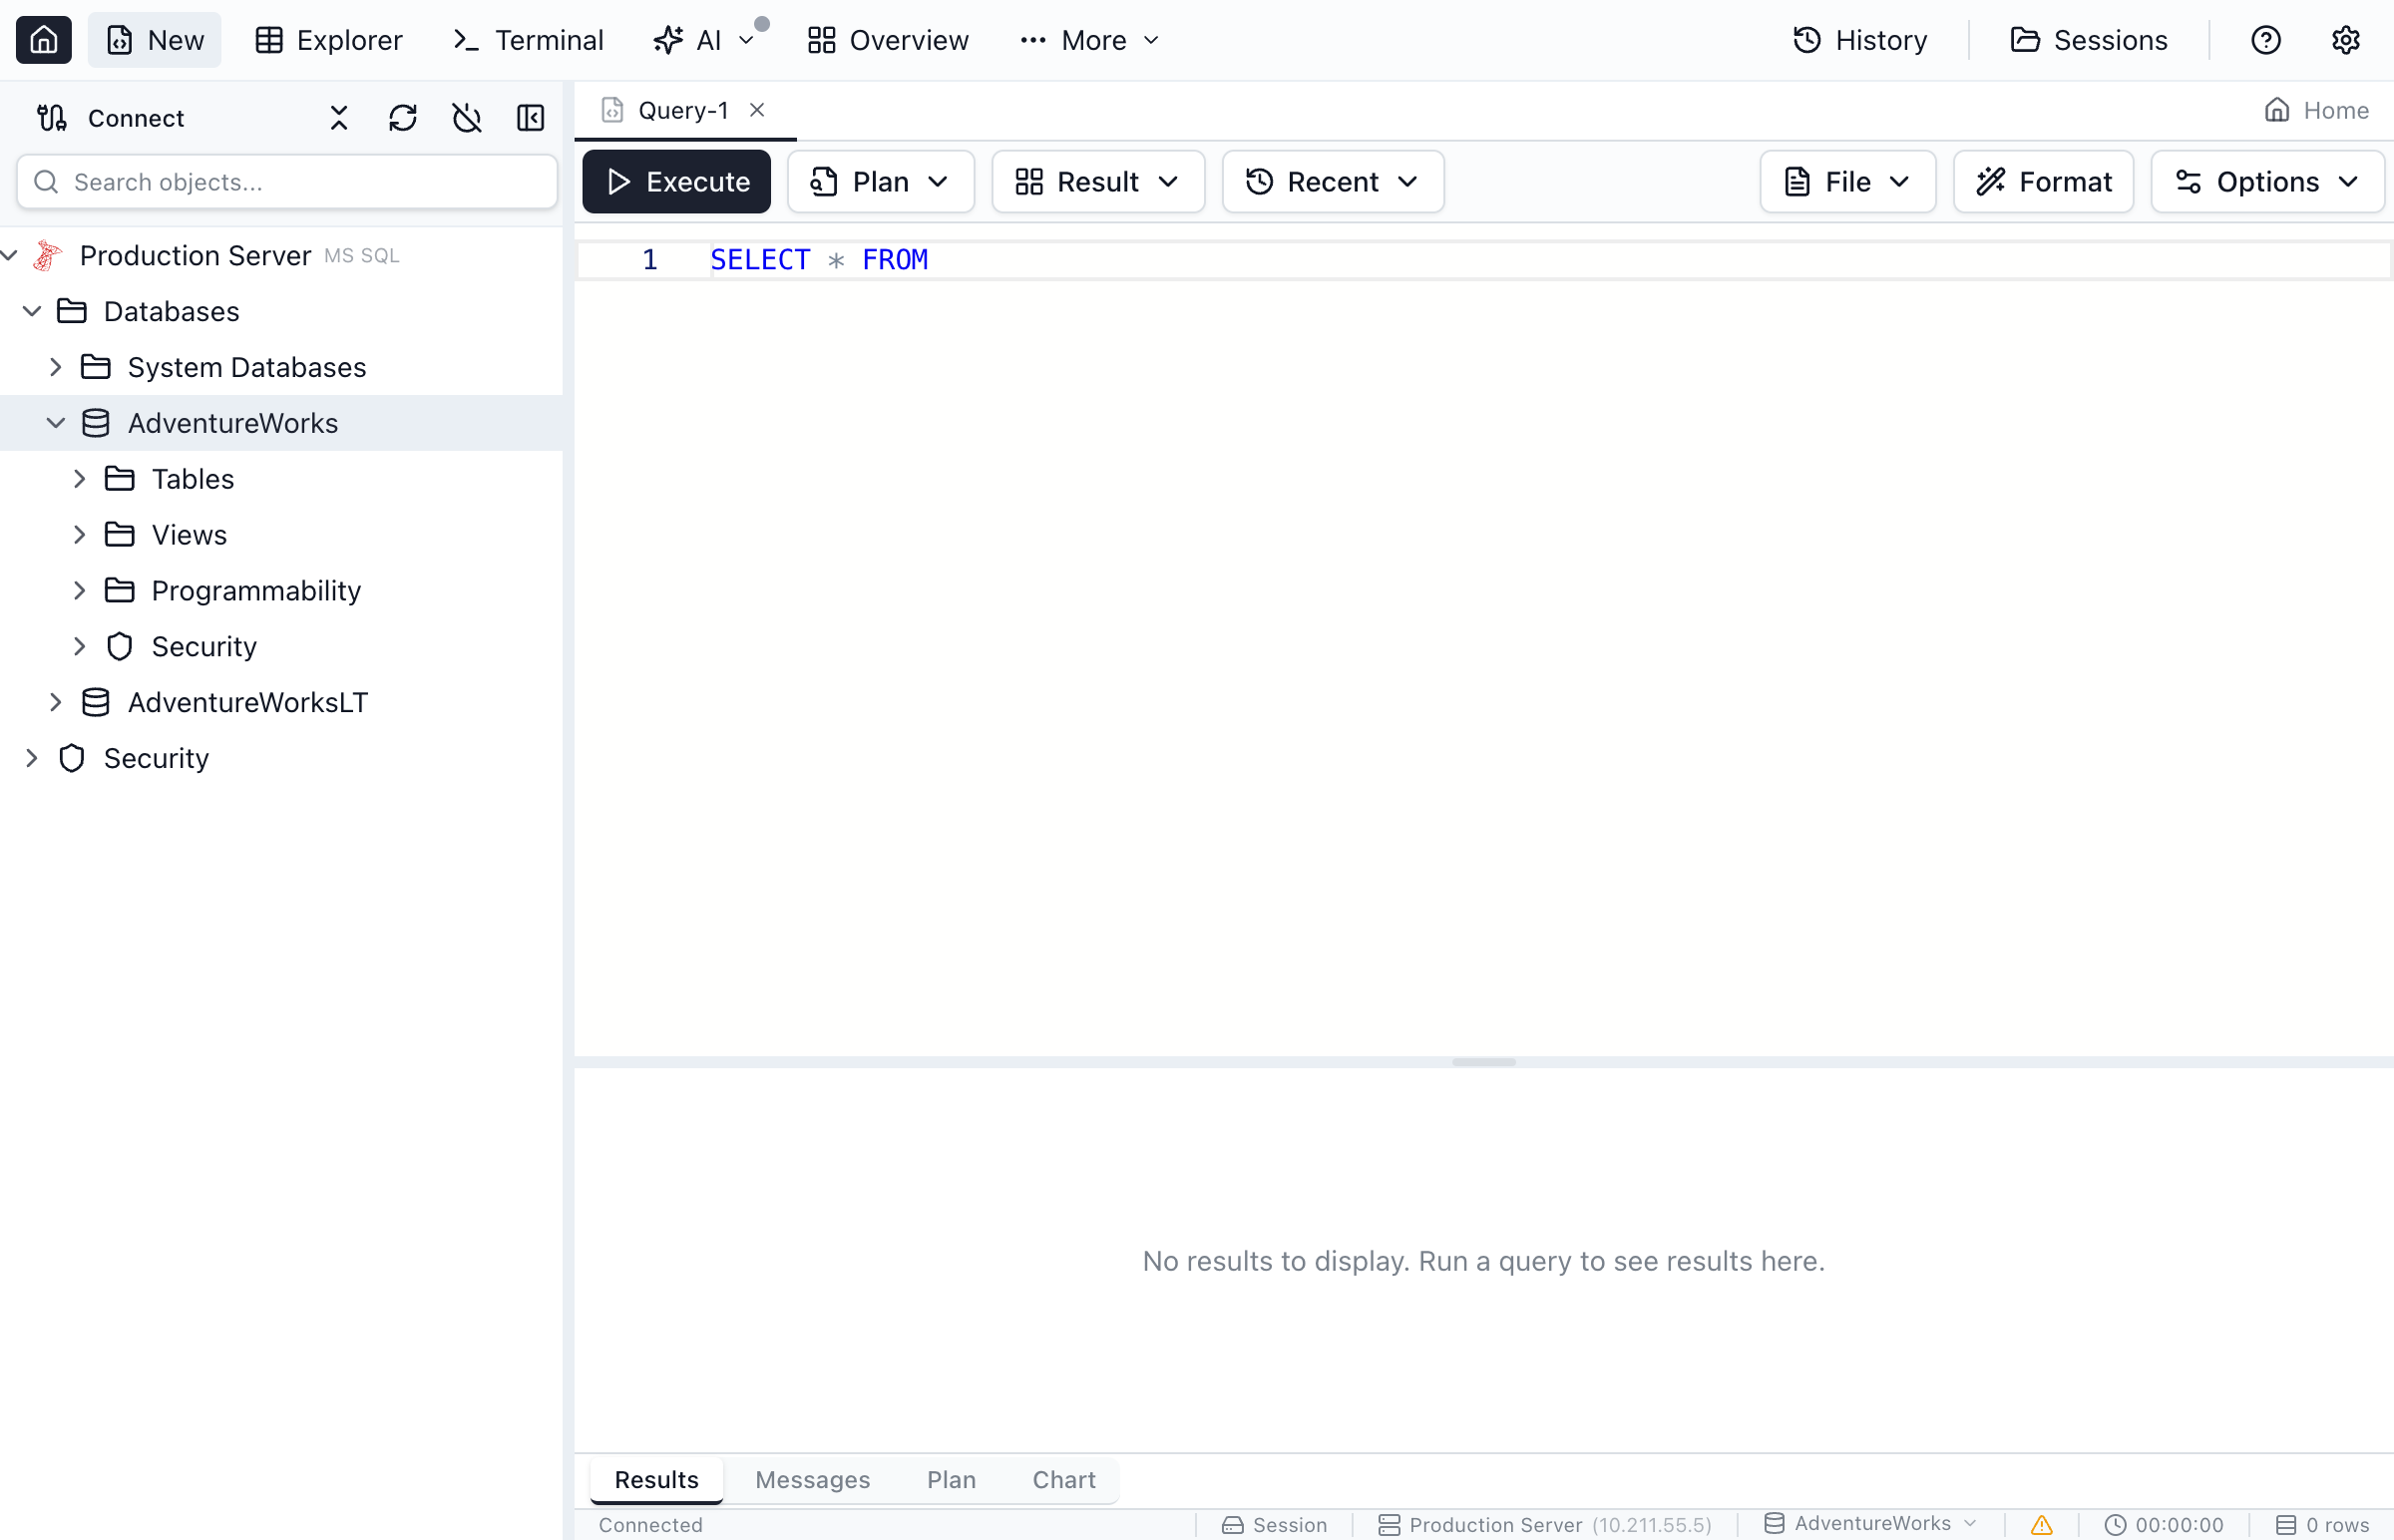
Step 3: Run Your First Query
Now that you're connected, let's run a simple query to explore your data.
Open a new query tab
Click New Query in the toolbar or press Cmd+T (macOS) / Ctrl+T (Windows/Linux).
Write your SQL
Type a query in the editor. For example:
SELECT TOP 10 * FROM sys.tables ORDER BY name;Execute the query
Press Cmd+E (macOS) / Ctrl+E (Windows/Linux) or click the Execute button. Results appear in the grid below.
Pinning Objects in the Sidebar
Once you're connected, you can pin the databases, schema containers, folders (Tables, Views, Stored Procedures, Functions), and individual objects you use most often to a list at the top of your connection — above Databases. This gives you one-click access without traversing the tree.
- Hover any pinnable row and click the small outline pin icon on the right.
- The icon becomes a filled pin that stays visible. Click it again — on the original row or the pinned copy at the top — to unpin.
- Pinned rows from the same database are grouped inside a subtle tinted "database area" with the database name printed in a tiny uppercase header above. That keeps two Tables folders pinned from different databases visually distinct without needing a per-row chip.
- Pinned rows are expandable shortcuts — click the chevron and they drill into the same children as the canonical tree (a pinned database expands into its object-type folders, a pinned Tables folder lists its tables, a pinned table opens its Columns / Keys / Indexes subfolders). Stored procedures and functions stay leaves. Expanded children render inside the same tinted area as the pinned parent.
- Hover a pinned row to reveal a grip handle on the left, then drag to reorder. Dragging a pin from one database into the middle of another database's pins is allowed — the pin keeps its database, and the visual splits into separate areas so the grouping always matches what's pinned.
- When you have one or more pins, the Databases folder no longer auto-expands on connect — the pinned area is the starting point. Click Databases any time to drill into the full schema.
- The sidebar search ignores the pinned shortcuts so a pinned table never shows up twice in your results (the canonical row under Databases is the one match).
- Pinned items appear lightly greyed when the connection is disconnected, and more strongly greyed (with a tooltip) when the underlying object is no longer present in the database.
Pins are stored per connection on disk as part of your connection's MetaInfo, so they survive app restarts and stay scoped to the connection they belong to.
Frequently asked questions
How do I install Jam SQL Studio?
Download Jam SQL Studio from jamsql.com for your operating system (macOS, Windows, or Linux). On macOS, drag to Applications. On Windows, run the installer. On Linux, use the AppImage or DEB package. No account required.
How do I connect to a SQL Server database?
Click the + button in the connections panel, select SQL Server as the engine type, enter your server address (e.g., localhost or myserver.database.windows.net), choose your authentication method (SQL Server auth, Windows auth, or Entra ID), and click Connect.
How do I run my first query?
After connecting to a database, click New Query in the toolbar to open the query editor. Type your SQL (e.g., SELECT * FROM sys.tables) and press Cmd+E (Mac) or Ctrl+E (Windows/Linux) to execute. Results appear in the panel below.
Is Jam SQL Studio free to use?
Yes, the Personal tier is free forever and includes unlimited SQL Server and PostgreSQL connections, IntelliSense, query execution, table explorer, and basic charting. Pro features are available with a 14-day free trial.
What databases does Jam SQL Studio support?
Jam SQL Studio supports Microsoft SQL Server (including Azure SQL), PostgreSQL (including Azure Database for PostgreSQL and Amazon RDS), MySQL (including MariaDB), Oracle Database (12.2+, 19c, 21c, 23ai), and SQLite. All engines include query execution and data export.
What's Next?
Now that you've connected and run your first query, explore more features:
Recommended Next Steps
- Explore the database - Use the sidebar to browse tables, views, and procedures
- Try Schema Compare - Compare schemas between two databases
- Analyze queries - View execution plans to optimize performance
- Organize scripts - Use the Scripts panel to pin and reopen .sql files
- Set up AI - Enable AI Workspace or MCP for AI-assisted development
Ready for More?
Explore the full documentation to learn about advanced features.